Stay Connected Anywhere: The Simple Guide to Using an eSIM for Travel
eSIM for travel is the easiest way to ditch roaming fees and physical SIM cards when you cross a border. You simply scan a QR code or tap a profile in your phone’s settings, and you’re instantly connected to a local network in your destination. No hunting for airport kiosks, no tiny card trays, and no surprise bills—just pick a data plan, activate it, and use your phone exactly like you do at home.
Why Your Next Trip Needs a Digital SIM Card Instead of Roaming
Roaming ties you to your home carrier’s inflated rates and sluggish networks, while a digital SIM lets you purchase a local data plan before you even board. For travel, an eSIM means you land with instant connectivity—no hunting for airport SIM kiosks or fumbling with tiny nano-cards. You can switch between country-specific profiles in your phone’s settings, avoiding the hefty per-megabyte bills that arrive weeks after you return. Battery drain drops too, because you’re not constantly scanning for a weaker roaming tower. Security improves as well, since you can keep your primary number for iMessage or WhatsApp while using a separate data-only line. Yet the real win is the freedom to top up a 3-day plan mid-trip without committing to a 30-day contract. That flexibility—not just cost—is why your next journey should skip roaming entirely.
What Exactly Is a Travel eSIM and How Does It Work on Your Phone?
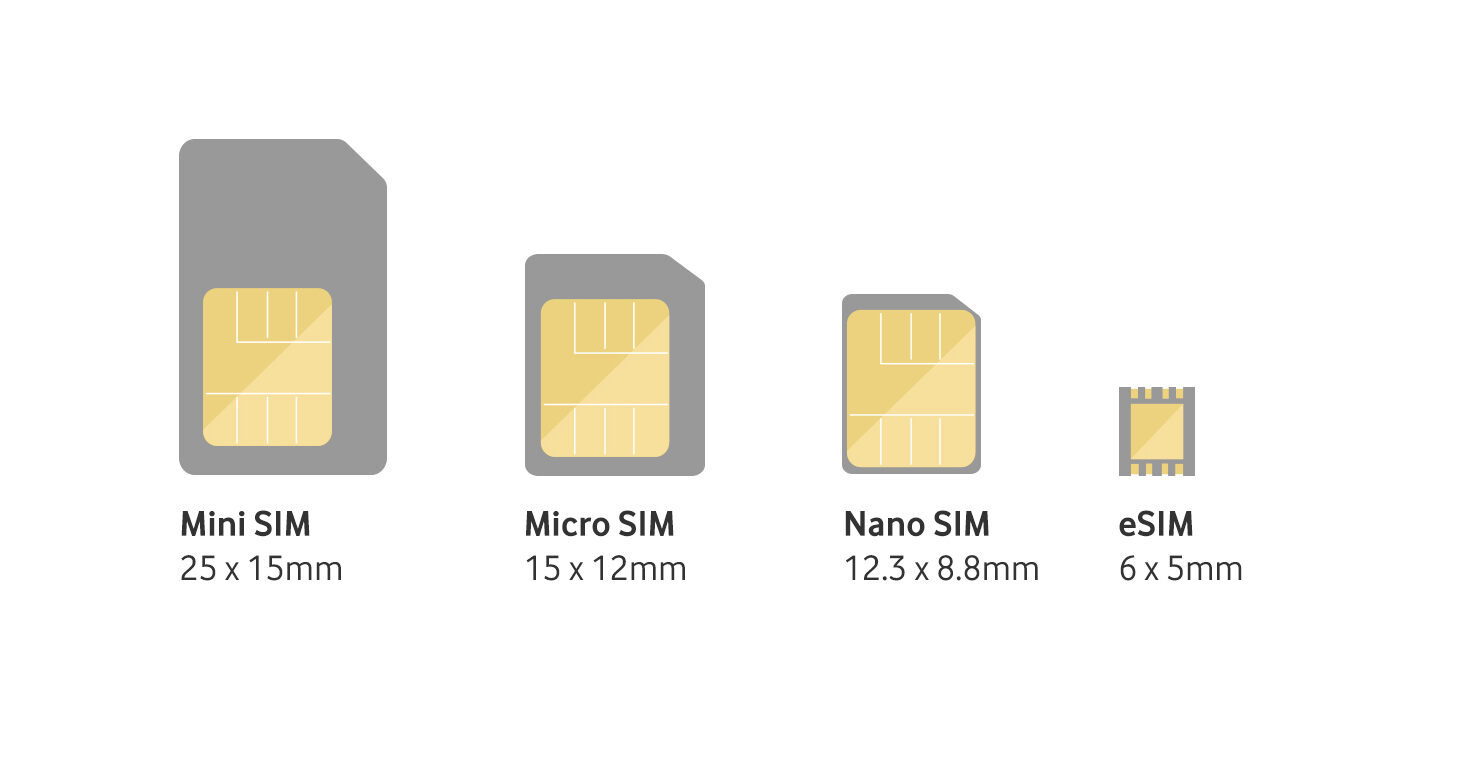
A travel eSIM is a digital SIM card you install on your phone before or after arriving at your destination, replacing the need for a physical plastic card. It works by downloading a carrier profile directly onto your device’s embedded chip, which then connects to local networks automatically. Once activated, your phone treats it like a normal SIM, giving you instant data access without swapping cards. You manage it through your phone’s settings, toggling between your home number and the travel data plan. Because it’s fully digital, setup takes minutes, and you can often buy and activate it while still at home, ensuring you’re connected the moment you land. This makes travel eSIM installation the most streamlined way to stay online abroad.
The Real Cost Difference Between Traditional Roaming and Local Data Plans
The real cost difference between traditional roaming and local data plans becomes obvious the moment you land. Roaming charges often hit $10–$15 per megabyte, draining a $50 allowance in minutes, while a local data plan via eSIM costs a fraction—often $10–$20 for a full gigabyte. Switching to a local eSIM data plan can cut your connectivity bill by up to 90% on a single trip. You pay for actual data, not the carrier’s convenience markup, and avoid shock bills that arrive weeks later. Even a short layover can justify the switch, since one roaming selfie may cost more than a day of local coverage. The savings compound across every map, message, and upload.
Traditional roaming charges per megabyte at premium rates, while local eSIM data plans offer flat, low-cost gigabytes—making the real cost difference a matter of cents versus dollars for the same usage.
How to Set Up a Travel eSIM Before You Board the Plane
To set up a travel eSIM before boarding, first confirm your phone is unlocked and supports eSIM—most recent models do. Purchase your travel eSIM from a reputable provider, selecting a plan covering your destination countries. Then, scan the QR code or manually enter the activation details in your phone’s cellular settings. Install the eSIM while still on Wi-Fi to download the profile instantly, avoiding data gaps at landing. Set the eSIM as your default for data, but keep your primary line active for calls and texts. Finally, enable data roaming for the eSIM only, and test the connection by toggling airplane mode. Doing this pre-flight means you land with seamless connectivity, no hunting for local SIMs or public Wi-Fi. Your eSIM for travel is ready before the wheels go up.
Step-by-Step: Checking Device Compatibility and Unlocking Requirements
Before purchasing a travel eSIM, verify your device is eSIM-compatible and carrier-unlocked. First, check your phone’s IMEI or settings under “About Phone” for an eSIM or digital SIM option; most newer models (iPhone XS or later, Pixel 3 or later) support it. Second, confirm your device is unlocked—contact your carrier or dial a USSD code like *#06# to see if the SIM slot is restricted. Third, review your current plan for a “SIM lock” status; if locked, request an unlock code before travel. Even a compatible phone will fail with eSIM if bootloader or regional locks persist. Then, test by scanning a free QR from your provider beforehand.
Installing Your eSIM Profile in Under Five Minutes—Even for Beginners
Installing your eSIM profile takes less than five minutes, and you can do it right after purchasing a plan—no technical background needed. Begin by scanning the QR code emailed to you, or tap the direct install link from your provider. Your phone will prompt you to add a cellular plan; approve it, then label it “Travel” for clarity. Finally, enable data roaming for that line and switch your default data to it. That’s it. Instant travel eSIM activation works this simply because modern phones auto-configure APN settings. Follow this sequence:
- Scan QR or tap the install link.
- Confirm the profile in Settings > Cellular.
- Activate the line and toggle roaming on.
You’re connected before your boarding call ends.
Choosing the Right Data Plan for Your Destination and Travel Style
Picking the right eSIM plan starts with matching data to your actual habits. For city-hopping in Europe, a regional 5GB package usually beats a single-country option, especially if you cross borders daily. Light users who just need maps and messaging can grab a 1GB plan, but if you’re constantly uploading photos or using video calls, spring for an unlimited tier to avoid throttling. Also, consider your travel style: backpackers bouncing between countries should prioritize multi-region coverage, while a business trip to one city might only need a short-term data pack. Check if the plan includes hotspot tethering—some budget eSIMs block it. Finally, compare validity lengths against your trip duration so you don’t overspend on days you’ll be home. **Data plan selection** becomes effortless when you audit your daily usage first. **Matching data volume** to your itinerary prevents both waste and panic.
Regional vs. Country-Specific Plans: Which Saves You More Money?
When calculating regional vs. country-specific eSIM costs, the savings hinge entirely on your itinerary’s density and data appetite. A country-specific plan wins if you stay in one nation for over five days, as regional bundles often inflate per-GB rates to cover multiple networks. Conversely, a regional plan saves more if you hop borders every 48–72 hours, because buying separate local eSIMs triggers repeated base fees and activation minimums that dwarf the regional markup. For light users under 3GB total, two country plans often beat a regional package; for heavy streamers crossing three or more countries, the regional tier’s pooled data eliminates topping-up penalties. Always compare the cheapest country option against the regional rate for your exact stay length.
Data Allowance Calculator: How Many Gigabytes Do You Actually Need?
A data allowance calculator eliminates guesswork by translating your travel habits into exact gigabyte needs. Start by listing daily activities: 30 minutes of navigation consumes roughly 150 MB, while streaming an hour of video uses about 700 MB. Social media scrolling with autoplay off adds 200 MB per hour. For a typical 7-day trip with light navigation, messaging, and occasional photo uploads, 3 GB suffices. Heavy users—constant video calls, cloud backups, or map downloading for offline use—should target 1 GB per day. Overbuying wastes money; underbuying triggers costly top-ups. Calculate based on your actual usage pattern, then add a 20% buffer for unexpected uploads or app updates. That precise number becomes your eSIM plan’s sweet spot.
Maximizing Connectivity on the Road: Features That Make a Difference
Maximizing connectivity on the road hinges on choosing an eSIM with **instant activation** and multi-network fallback. Instead of hunting for local SIM cards, you scan a QR code before departure and switch carriers in seconds if one network drops. Look for plans that offer automatic switching between regional towers—this ensures you’re not stuck on a weak signal in rural areas or underground transit. A critical feature is a user-friendly dashboard that tracks data in real time, so you can top up without panic.
The real game-changer is having a primary eSIM for data and keeping your physical SIM for calls, letting you toggle between them seamlessly as you cross borders.
Prioritize plans with low-balance alerts and no hidden roaming caps, so your connection stays reliable from city streets to coastal highways.
Keeping Your Primary Number Active While Using a Secondary Data Line
Keeping your primary number active while using a secondary data line is the smartest way to preserve two-factor authentication and emergency contacts abroad. By installing a travel eSIM for data only, your home SIM remains enabled for calls and SMS, even when roaming is off. Dual-SIM standby ensures zero service gaps, letting you receive bank verification codes without burning international data. To avoid surprise charges, lock your primary line to Wi-Fi calling before departure, and disable automatic carrier updates. Your secondary eSIM handles navigation and streaming, while your primary number stays reachable for vital notifications—no juggling physical cards, no lost connectivity.
- Enable Wi-Fi calling on your primary SIM to receive texts over the data line.
- Manually select your home network to prevent roaming fees on the primary number.
- Keep the primary SIM active in the slot; the eSIM runs data concurrently.
- Test SMS reception before you leave to confirm dual-SIM settings work.
Hotspot Sharing and Fallback Options for Unreliable Networks
When your hotel Wi-Fi drops or a remote trail kills your signal, hotspot sharing and fallback options for unreliable networks become your travel lifeline. With eSIM, you can flip your phone into a personal hotspot so your laptop or tablet stays online for maps or work—even if the hotel router keeps failing. Many eSIM apps also let you pre-download multiple carrier profiles, so if one network drops, you manually switch to a backup without hunting for a physical SIM. Some even support automatic fallback, toggling to a secondary data plan the moment the primary one stutters. That means you’re never stuck buffering or offline, just a quick setting tweak away from a steady connection.
Avoiding Common Pitfalls and Getting Help When Things Go Wrong
The most common eSIM travel pitfall is installing it before leaving Wi-Fi range, so activate and test your connection at home while online. Another frequent issue is manually toggling the wrong line—disable your primary SIM’s data roaming to avoid surprise charges, and label each profile clearly. If you lose service mid-trip, first restart your phone, then check that “Data Roaming” is on for the eSIM line. For quick help, always download your provider’s support app or save their offline FAQ page before departure, since airport Wi-Fi may be unreliable. Q: What should you do if your eSIM isn’t working abroad? A: Toggle airplane mode on/off, then reset network settings; if that fails, force-quit carrier settings by inserting any physical SIM, or contact your provider via their in-app chat using hotel Wi-Fi.
What to Do if Your eSIM Doesn’t Activate After Landing
If your eSIM doesn’t activate after landing, first toggle Airplane Mode on and off to force a network re-registration. Next, manually select your destination’s network in your phone’s cellular settings, since auto-selection sometimes fails. Confirm that data roaming is enabled for that specific eSIM line—this is a frequent culprit. If the status says “No Service,” reboot your device completely. Still stuck? Delete and re-install the eSIM using the QR code or installation link from your provider’s email. As a last resort, hop onto airport Wi-Fi to chat with your carrier’s support; they can push a new activation profile instantly. Avoid buying a new plan until you’ve tried these steps—fixing eSIM activation on arrival is usually a two-minute settings tweak.
Remember: toggle roaming, manually select the network, reboot, reinstall the eSIM, and only then contact support over Wi-Fi.
Battery Drain, Signal Issues, and Other Troubleshooting Quick Fixes
When your travel eSIM starts acting up, battery drain and signal issues usually top the list of annoyances. A sudden power hog often means your phone is aggressively $1 eSIM hunting for a weak network—so switch to a manual carrier selection and pick the strongest local option. For spotty connectivity, toggle airplane mode for 30 seconds to force a fresh registration. If data crawls, check that your APN settings match your eSIM provider’s exact instructions. Otherwise, restart your device before digging deeper. Quick fixes for eSIM travel glitches save your day without a support ticket.
- Disable automatic network selection to stop battery-draining signal scans.
- Reset network settings (not the whole phone) to clear stuck connections.
- Keep only one active data line—dual SIMs can confuse your radio and drain power.
- If calls drop, force 3G/4G instead of 5G in areas with poor coverage.
Frequently Asked Questions About Switching to a Digital SIM for Travel
You’re probably wondering if your phone even supports it—most newer models do, but you can check under *Settings > Cellular* for an “Add eSIM” option. A common question is whether you’ll lose your physical SIM; the answer is no, you can keep both active, which means you can receive calls on your home number while using a travel data plan abroad. People often ask about setup times, and the truth is, scanning a QR code from your provider takes roughly two minutes—no need to visit a store. For those worried about switching mid-trip, you can install the eSIM for travel before you fly, then activate it only upon landing, saving your daily allowance. One crucial detail: ensure your phone is unlocked, or the digital SIM simply won’t register. Finally, don’t stress about coverage—you’ll get a local network automatically, and you can troubleshoot by toggling data roaming on, which is usually the only hiccup travelers face.
Can You Use a Travel eSIM in a Phone That’s Carrier-Locked?
If your phone is carrier-locked, you usually cannot use a travel eSIM — the lock restricts the device to only your home carrier’s network profiles. Before buying an eSIM, check your phone’s settings under “Cellular” or “Mobile Data” for an option to “Add eSIM.” If that option is greyed out or you get an error, the lock is likely blocking it. Some carriers will temporarily unlock your phone if you ask, especially for international travel. However, a travel eSIM won’t bypass the lock, and using a physical SIM adapter with a locked phone also fails. Always confirm your unlock status with your carrier first, or your digital SIM purchase could be wasted.

What Happens to Your Existing Apps and Services That Use Your Old Number?
When you switch to a travel eSIM, your physical SIM usually stays idle but active, meaning your old number continues receiving SMS for app verification and banking OTPs—so long as your phone supports dual SIM standby. However, if you remove the physical card, **two-factor authentication for travel** collapses: apps like WhatsApp, banking portals, and social logins that rely on your home number will fail to receive codes. To avoid lockouts, keep your primary SIM installed for inbound texts, or migrate critical accounts to email-based verification before you leave. Without this preparation, password resets and login prompts can become impossible to complete mid-trip.
About the Author
